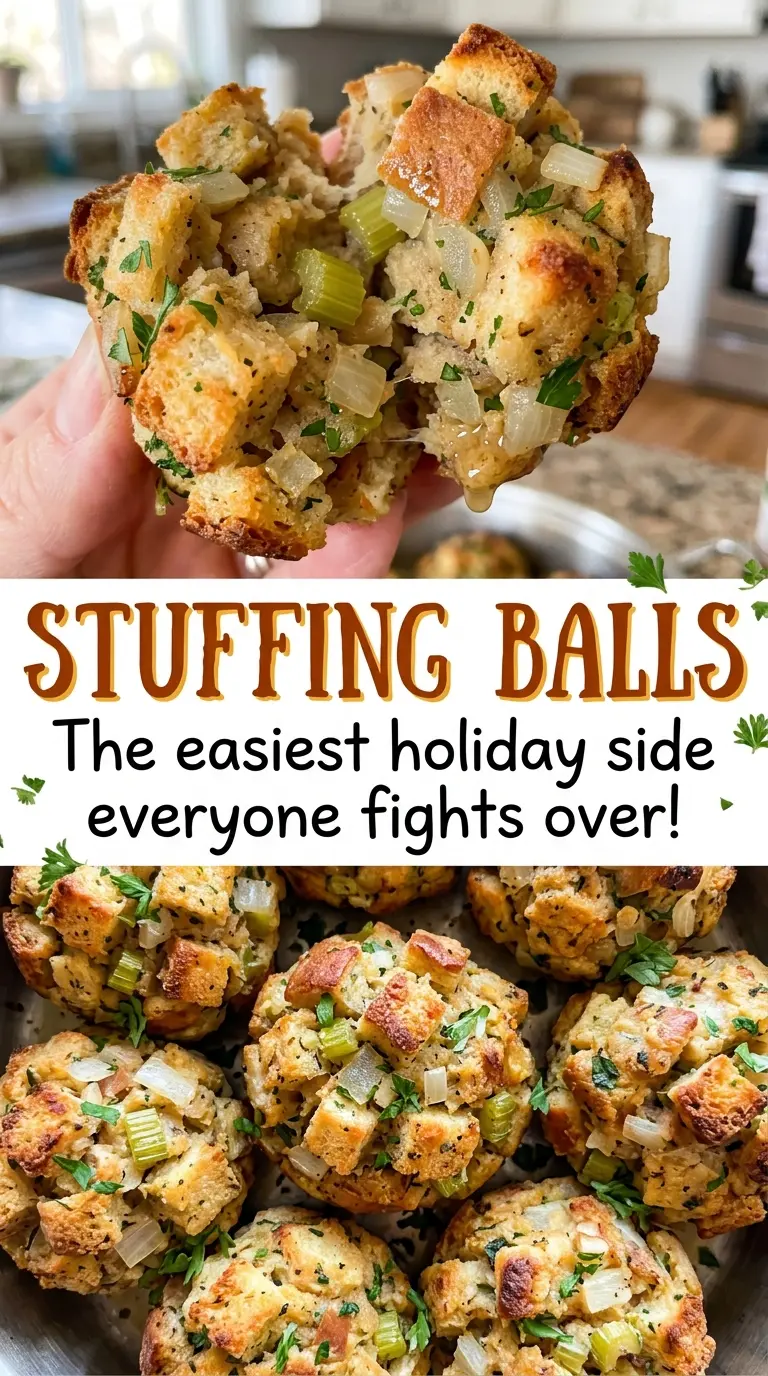
When the baking sheet comes out, the tops are browned and the kitchen smells of sage and warm butter. I like stuffing in individual portions because every stuffing ball gets a little color on the outside and a soft center, instead of just a few browned pieces from the top of a casserole. They’re savory and familiar, with parsley bringing a fresh note to the herbs.
These are the kind of side dish that feel special without asking for fussy shaping. The mixture comes together in a bowl, and each portion goes straight onto a greased baking sheet. I aim for balls about the same size so they bake evenly, then let them rest before serving. The result is a tender, well-seasoned middle wrapped in browned edges.

Kitchen Note
Let the balls rest on the baking sheet for the full five minutes before lifting them. They’re easier to serve once the centers have settled, and the browned edges are less likely to break apart while they’re still piping hot.
Save these Stuffing Balls for a meal that calls for buttery, sage-scented stuffing in easy-to-serve portions.
Why a Baking Sheet Gives Every Stuffing Ball Its Own Browned Edge
A pan of stuffing usually has one main crust: the surface that meets the oven’s heat. Shape the mixture into individual portions, and each one has its own outside to brown. That means a browned bite isn’t reserved for the corners or the top layer; each ball gets some color around its surface while the middle stays tender.
The shape also makes doneness worth checking carefully. A browned exterior tells you the surface has cooked, but it can’t tell you whether the center is ready. Keep the balls close to the same size, and use the visual cue and the center temperature together rather than waiting for them to look deeply dark. The goal is a browned outside with a moist, cohesive middle, not a dry ball that’s been left in the oven too long.
There’s no need to press the mixture into a dense mound to get that structure. The egg in the mixture helps hold the bread together, while the individual shape leaves plenty of surface exposed for browning. Treat each portion gently, and the finished texture stays closer to tender stuffing than a compact bread dumpling.
Why Plain Dried Bread Cubes Are the Right Starting Point
- Plain dried bread cubes — Their dry, sturdy texture takes up the broth mixture without starting out soft. Fresh bread isn’t a direct replacement; it carries more moisture and can leave the mixture difficult to shape. A freshly opened package is fine, so there’s no need to seek out an expensive brand.
- Unsalted butter — It gives the onion and celery a rich base and lets you control the seasoning from the salt in the mixture. The everyday grocery-store kind works well here; the important detail is using unsalted butter for a more predictable result.
- Onion and celery — Finely chopping both helps them soften evenly and spread through the bread instead of making a few balls bulky with large pieces. Choose firm celery and a fresh onion; there’s no special variety needed.
- Chicken broth and eggs — The broth carries moisture and savory flavor through the cubes, while the eggs help the portions hold their shape. A standard chicken broth works. For a vegetarian version, vegetable broth is a practical substitute; the flavor will be a little less poultry-forward.
- Parsley, poultry seasoning, and sage — Together, these give the stuffing its familiar herb character. Fresh parsley brings a brighter note, while dried sage and poultry seasoning are pantry-friendly; replace stale herbs if they’ve lost their aroma.
From Softened Vegetables to Browned, Set Centers
Soften the Onion and Celery in Butter
Heat the oven to 375°F and grease a rimmed baking sheet. Melt the butter in a large skillet over medium heat, then add the finely chopped onion and celery. Cook for 6 to 8 minutes, until the vegetables have softened. If they’re still firm and sharply crunchy, give them the full time they need before moving on.
Coat the Bread Cubes with the Seasoned Butter
Put the bread cubes in a large bowl with the parsley, poultry seasoning, sage, salt, and pepper. Add the softened vegetables along with all the butter from the skillet, then toss until the seasoning and buttery vegetables are distributed through the cubes. Take a moment to scrape the skillet well so that the butter doesn’t stay behind. You want a consistent base before adding the liquid mixture.
Spread the Broth-and-Egg Mixture Evenly
Whisk the chicken broth and eggs together in a medium bowl, then pour the mixture over the bread. Stir until the cubes are evenly moistened rather than leaving a wet pocket at the bottom of the bowl. If the mixture looks patchy, keep stirring gently until the liquid has reached the whole batch. Avoid mashing the cubes; they should still hold their shape.
Shape Even Portions That Hold Together
Shape the mixture into 16 balls, each about 2 inches wide. Gently press each portion so it holds together, without packing it tightly. Set the balls on the prepared baking sheet. Keeping them close to the same size helps them cook at a similar pace.
Bake for Color, Then Check the Centers
Bake for 30 to 35 minutes, until the stuffing balls are browned and the centers reach 165°F on an instant-read thermometer. Start checking toward the end of the baking window; the outside can brown before the middle is ready. Once they’re baked through, leave them on the sheet for 5 minutes before serving.
Two Useful Ways to Change the Bread or Broth
Make the stuffing vegetarian with vegetable broth
Replace the chicken broth with the same amount of vegetable broth. The balls will still bind and bake as expected, though they’ll have a gentler, less poultry-forward savory flavor. The eggs and butter remain, so this is a vegetarian adaptation rather than a vegan one.
Use dried gluten-free bread cubes
For a gluten-free batch, use a 12-ounce package of plain dried gluten-free bread cubes in place of the regular cubes. Choose firm, dried cubes rather than soft bread; different brands absorb liquid a little differently, so stir carefully until the mixture is evenly moistened. The flavor stays familiar, though the finished texture depends on the bread’s structure.
Storage and Reheating
- Refrigerator: Cool and refrigerate in an airtight container within 2 hours. Use within 3 to 4 days; the browned outside will soften as the balls chill.
- Freezer: Freeze the baked balls in a single layer, then transfer them to an airtight freezer container for up to 3 months. Thaw overnight in the refrigerator for the most even reheating.
- Reheating: Warm them in a 350°F oven, loosely covered with foil, until hot throughout. Leaving them uncovered the whole time can dry the outside before the centers warm through.
Questions That Come Up When Making Stuffing Balls
Stuffing Balls
Ingredients
Equipment
Method
- Heat the oven to 375°F.
- Grease a rimmed baking sheet.
- Melt the butter in a large skillet over medium heat.
- Add the onion and celery, and cook for 6 to 8 minutes until softened.
- Put the bread cubes, parsley, poultry seasoning, sage, salt, and pepper in a large bowl.
- Add the cooked vegetables and butter, and toss to combine.
- Whisk the broth and eggs in a medium bowl.
- Pour the broth mixture over the bread mixture.
- Stir until evenly moistened.
- Shape the mixture into 16 balls, about 2 inches wide, gently pressing each one so it holds together.
- Arrange the balls on the prepared baking sheet.
- Bake for 30 to 35 minutes until browned and the centers reach 165°F on an instant-read thermometer.
- Let the stuffing balls rest on the baking sheet for 5 minutes before serving.