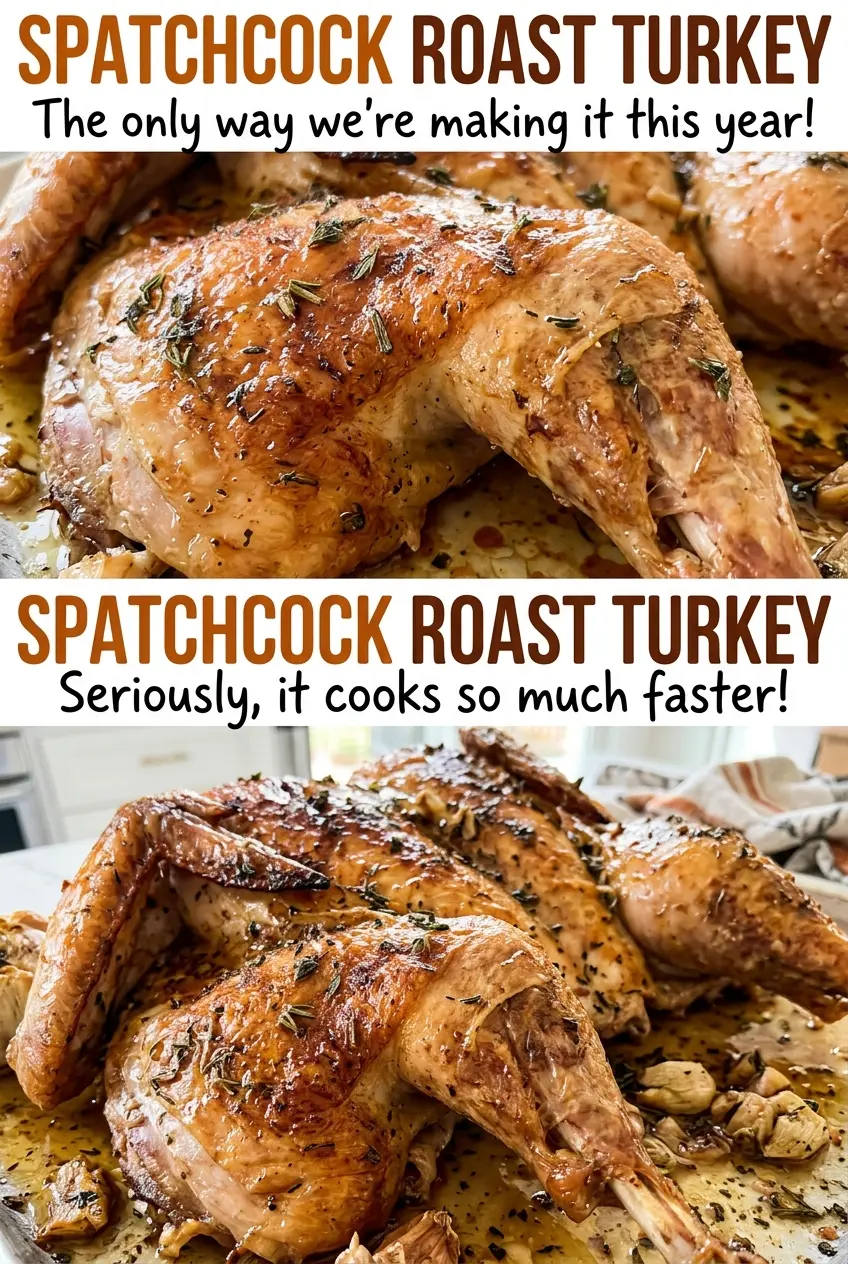
The first thing I notice after pressing the breastbone is how much easier it is to see every part of the turkey at once. The bird lies flat instead of wobbling around a deep cavity, and that makes seasoning and checking the thickest spots feel far less awkward. For a table of ten, this spatchcock roast turkey gives you a full-size centerpiece without asking you to wrestle a whole bird in and out of the oven.
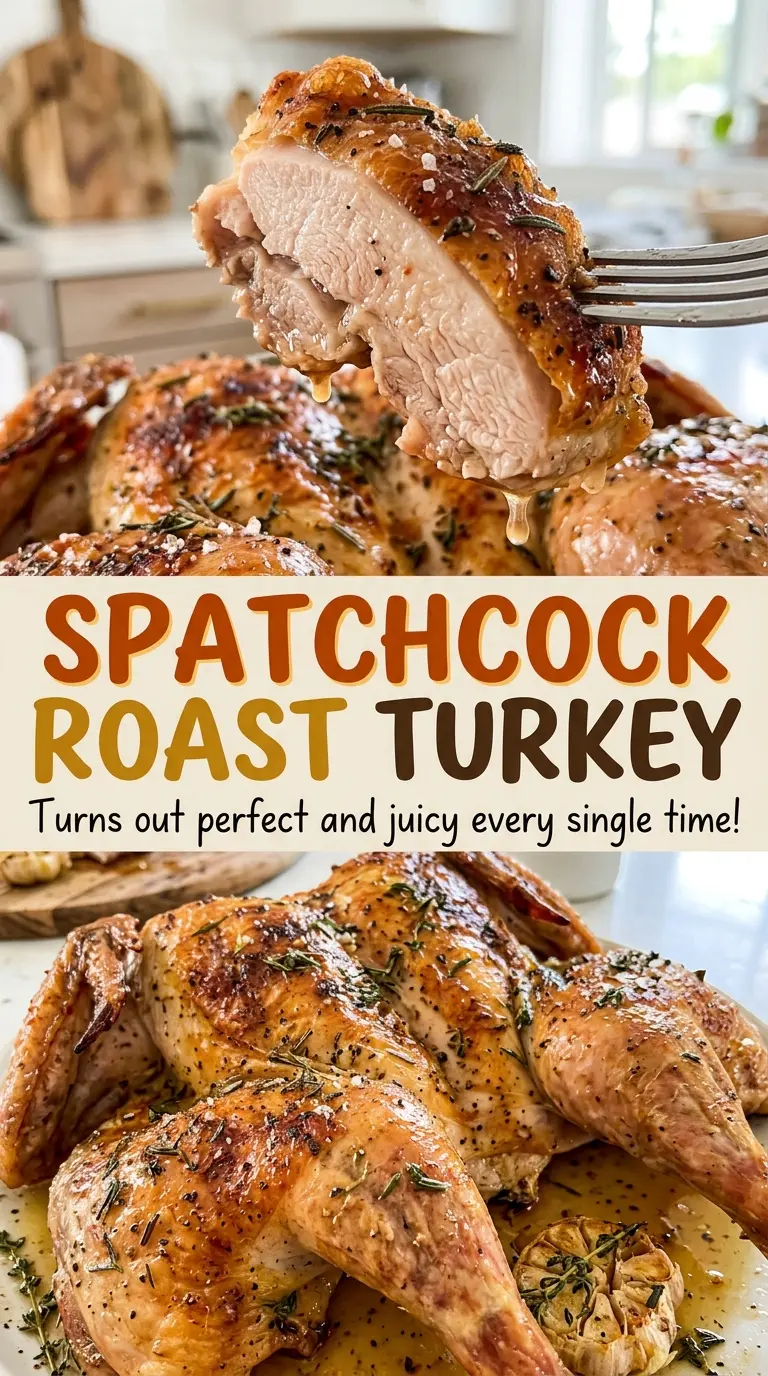
I keep the seasoning simple: fine salt, black pepper, and softened unsalted butter tucked beneath the skin over the breast and thighs. The butter stays close to the meat, while the skin remains exposed to the oven heat. A wire rack lets the turkey sit above the pan, and an instant-read thermometer tells me when both the breast and thigh are ready. The result is a broad, browned bird with juicy slices and skin worth bringing to the table.
Kitchen Note
Softened butter should spread with gentle pressure under the skin. If it feels firm and pulls at the skin, give it a little more time at room temperature before you start.
Save this spatchcock roast turkey for its broad, browned skin and tender slices, seasoned with butter tucked beneath the skin.
Why Flattening the Turkey Helps You Check More Than the Breast
A whole turkey has a rounded shape, with its breast sitting high and the legs tucked lower. Once you remove the backbone and press the breastbone until the bird lies flat, those parts are easier to reach and monitor while the turkey roasts. That flat profile also makes it simpler to spread seasoning across the skin and get butter beneath the skin over both the breast and thighs, instead of trying to work around a bulky bird.
Don’t judge doneness by the color of the skin or by checking one convenient spot. Breast and thigh meat are different thicknesses, so a reading in only one area doesn’t tell you whether the other has reached the same point. I check the thickest part of the breast and the innermost thigh separately. When both meet the target temperature, the bird is ready to come out. The thermometer—not the clock alone—is what settles the question.
The pan setup matters here, too. An 18-by-13-inch rimmed baking sheet gives the flattened turkey room to sit skin-side up on its wire rack. Keeping it on the rack rather than directly in the pan leaves the bird elevated while it roasts, and the rimmed sheet catches what collects below.
What the Butter, Salt, and Turkey Each Bring to the Roast
- Whole turkey — Choose a bird in the stated 12- to 14-pound range, fully thawed, with the neck and giblets removed. That size is the one this pan setup and roasting window are built around. A fully thawed bird is also much easier to cut through with kitchen shears and press flat.
- Fine salt — Fine grains spread evenly over a broad surface and through the cavity area, so you don’t end up with a few harshly salted patches. Unsalted butter leaves the salt level in your hands instead of bringing extra seasoning along with it.
- Black pepper — Pepper gives the simple seasoning a warm, savory edge against the turkey and butter. Spread it evenly with the salt rather than leaving it in concentrated spots.
- Unsalted butter — Softened butter can be spread beneath the skin over the breast and thighs, close to the meat. Unsalted butter is useful here because it adds richness without changing the salt level you’ve already set.
The Cutting, Seasoning, and Roasting Stages That Matter
Heat the Oven and Set Up the Pan
Heat the oven to 425°F with a rack in the lower third. Set a wire rack inside an 18-by-13-inch rimmed baking sheet before bringing over the turkey. The turkey needs to sit skin-side up on this rack once it’s flattened. Putting the oven rack in position now saves you from reaching around a hot oven later.
Cut Out the Backbone and Flatten the Bird
Set the turkey breast-side down on a cutting board and use sturdy kitchen shears to cut along both sides of the backbone. Remove the backbone, then turn the turkey breast-side up. Press firmly on the breastbone until the bird lies flat; if the center still arches upward, it hasn’t flattened yet. Take your time with the shears rather than forcing a cut that won’t go through cleanly.
Dry, Season, and Butter Beneath the Skin
Pat the turkey dry, then place it skin-side up on the rack in the baking sheet. Season it evenly with the fine salt and black pepper, including the cavity area. Spread the softened butter beneath the skin over the breast and thighs, taking care to distribute it rather than leaving one thick pocket. Keeping the butter under the skin is what puts it against the meat instead of hiding the turkey skin beneath a coating.
Roast Until Both Test Spots Reach Temperature
Roast for 1 hour 15 minutes to 1 hour 45 minutes, checking after 1 hour 15 minutes. Insert an instant-read thermometer into the thickest part of the breast and the innermost thigh; both should register 165°F. The skin’s color is not a substitute for those readings. If it browns too quickly before the turkey is ready, loosely tent the bird with foil.
Rest Before Carving
Transfer the roasted turkey to a cutting board and leave it undisturbed for 20 minutes before carving. That pause gives the hot meat time to settle after roasting, so carving doesn’t begin the instant the bird leaves the oven. Set out a board with room to work; a flattened turkey still needs space for separating the legs and slicing the breast.
Two Simple Ways to Adapt This Turkey Without Changing Its Shape
A dairy-free roast without the butter
Leave out the butter and keep the turkey seasoned with salt and black pepper. The meat will lose the richness the butter brings beneath the skin, but the bird can still be spatchcocked and roasted using the same thermometer checks. This is the straightforward option when dairy needs to stay off the table.
A milder turkey with no black pepper
For anyone who prefers a gentler seasoning, leave out the black pepper and use the salt and butter as usual. The result keeps the rich, buttery turkey flavor without pepper’s bite. This changes the seasoning, not the roasting setup.
Storage and Reheating
- Refrigerator: Refrigerate leftover turkey within 2 hours and use it within 3 to 4 days. The chilled skin won’t stay crisp, though the sliced meat keeps well.
- Freezer: Freeze carved meat in an airtight container for 2 to 6 months for best quality. Thaw it in the refrigerator before reheating.
- Reheating: Warm sliced turkey covered in a low oven until hot throughout. Keep it covered rather than leaving it exposed to oven heat, which can dry out the breast.
Questions That Come Up While Roasting a Spatchcock Turkey
Spatchcock Roast Turkey
Ingredients
Equipment
Method
- Heat the oven to 425°F and place a rack in the lower third.
- Set the turkey breast-side down on a cutting board.
- Use sturdy kitchen shears to cut along both sides of the backbone.
- Remove the backbone.
- Turn the turkey breast-side up and press firmly on the breastbone until the bird lies flat.
- Pat the turkey dry.
- Place it skin-side up on a wire rack set inside an 18x13-inch rimmed baking sheet.
- Season the turkey evenly with the salt and pepper, including the cavity area.
- Spread the softened butter beneath the skin over the breast and thighs.
- Roast for 1 hour 15 minutes to 1 hour 45 minutes, checking after 1 hour 15 minutes, until the thickest part of the breast and the innermost thigh register 165°F on an instant-read thermometer.
- Loosely tent with foil if the skin browns too quickly.
- Transfer the turkey to a cutting board and rest for 20 minutes before carving.