Red white and blue marble cake turns a simple vanilla layer cake into something festive without tasting gimmicky. The crumb stays soft and buttery, the swirls stay bold after baking, and every slice has that clean contrast of colors that makes people reach for a second piece before they finish the first. It looks party-ready on the table, but it still eats like a proper homemade cake, not just a decoration project.
The part that matters most is the batter texture. You want a smooth vanilla base that can hold color without getting thin, so the butter and sugar need to be beaten until fluffy and the eggs added one at a time. Gel food coloring is the best choice here because it gives you strong red and blue color without throwing off the batter consistency the way liquid coloring can. A gentle swirl keeps the colors distinct; too much stirring and you lose the marble effect completely.
Below, I walk through the part people usually rush: how to divide and color the batter so the swirls stay bright, how to frost a marble cake without dragging crumbs through the finish, and a few smart swaps if you need a dairy-free version or want to make the cake a day ahead.
The cake baked up so moist and the red and blue swirls stayed bright instead of turning muddy. I also loved that the frosting set smooth enough to slice cleanly for our cookout.
Save this red white & blue marble cake for the celebration dessert that slices cleanly and keeps its bright patriotic swirls.
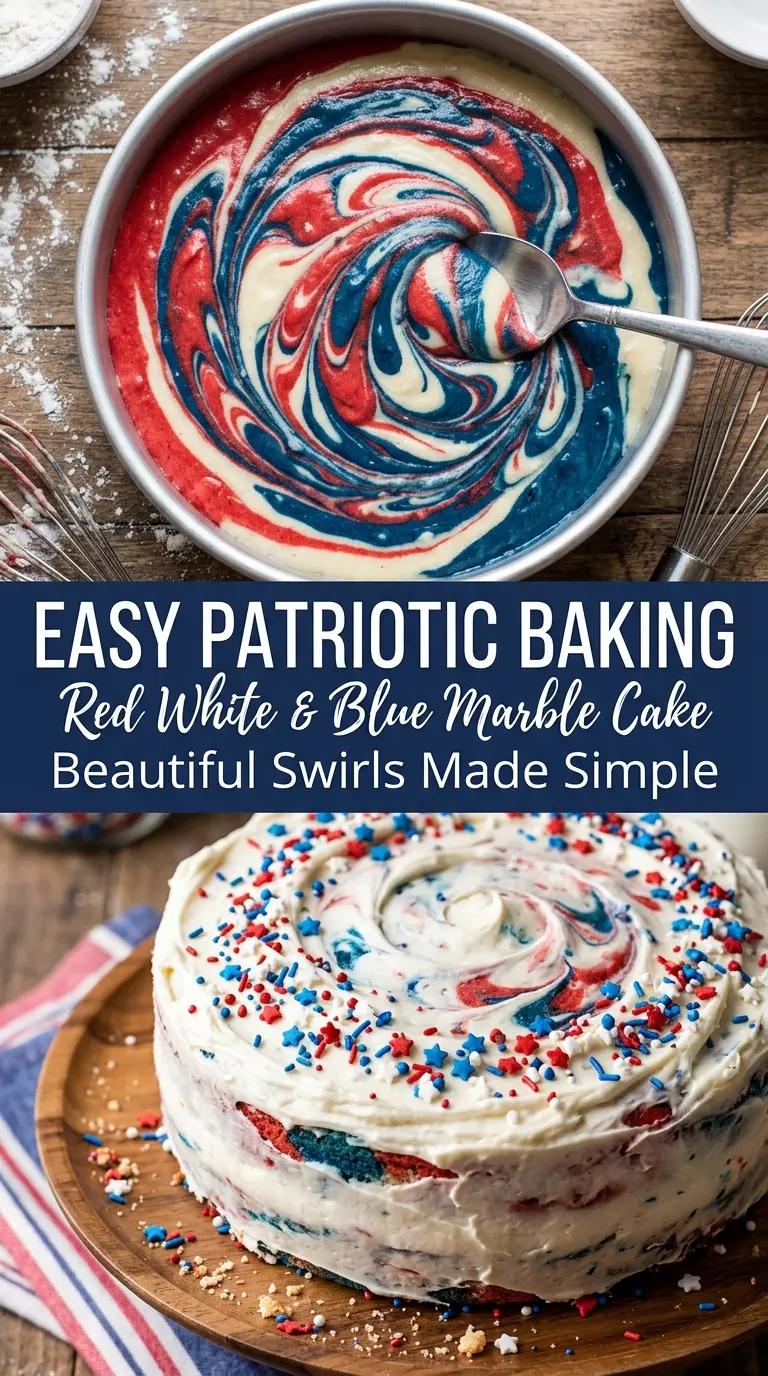
The Trick to Keeping the Swirls Bright Instead of Muddy
The marble effect falls apart when the batter gets overmixed. Once the red and blue batters hit the pan, you only want a few slow passes with a knife or skewer. The goal is ribbons, not a fully blended batter. If you stir until the color disappears into the vanilla, you end up with a pale pastel cake instead of those bold, separate swirls that make this dessert stand out.
Temperature matters here too. Room-temperature butter, eggs, and milk create a smoother batter that takes color evenly and bakes with a fine crumb. Cold ingredients can leave you with streaks of butter that refuse to incorporate, and that shows up as dense spots in the finished cake. The batter should look thick, glossy, and scoopable before you divide it.
- Unsalted butter — This gives you control over the salt level and builds the tender crumb. Softened butter creams with the sugar properly; melted butter won’t trap air and the cake will bake up heavier.
- Whole milk — The fat in whole milk keeps the batter rich and helps the cake stay moist. Lower-fat milk works in a pinch, but the texture won’t be quite as plush.
- Gel food coloring — Gel is the right choice because it delivers strong color without thinning the batter. If you use liquid coloring, you may need several drops and the batter can loosen enough to affect the swirl.
- Vanilla extract — This is the flavor backbone of the cake, so use one you actually like. The vanilla keeps the color from tasting one-note and gives the cake that classic bakery-style finish.
- Powdered sugar frosting — The frosting should be thick enough to hold shape but still spreadable. If it seems too stiff, add cream a teaspoon at a time so you don’t cross into runny territory.
How to Build the Batter So the Colors Stay Separate
Creaming the Butter and Sugar
Beat the butter and sugar until the mixture looks pale and fluffy, not just combined. That step creates the air that helps the cake rise evenly and keeps the crumb light. If the butter is too cold, the mixture will look grainy and stay heavy, so let it soften fully before you start. Scrape the bowl a few times so no pockets of unmixed butter hide at the bottom.
Dividing and Coloring the Batter
Split the batter into three equal portions, then leave one plain, tint one red, and one blue. Add color gradually with a toothpick or small spatula so you don’t overshoot and end up with neon batter. Gel color deepens as it sits, so stop a little short of your final shade. Stir just until the color is even; extra mixing starts building gluten and tightens the crumb.
Swirling in the Pans
Alternate spoonfuls of each batter into the prepared pans so the colors stack in layers. Drag a knife or skewer through the batter in slow figure-eight motions, then stop. If you keep going, the colors blur into purple-gray streaks. A few deliberate swirls are enough because the oven will finish the pattern as the cake rises.
Frosting and Finishing
Beat the frosting until it turns smooth and spreadable, then frost the completely cooled cake. If the layers are even a little warm, the buttercream will slide and the surface will tear. Start with a thin crumb coat if you want the cleanest finish, then add the final layer and decorate with sprinkles and berries. The berries add a fresh bite, but they need to go on right before serving so they stay glossy.
How to Adapt This for Different Parties and Dietary Needs
Dairy-Free Version
Use a good dairy-free butter substitute for both the cake and frosting, and swap the milk for an unsweetened neutral plant milk. The cake will still bake up soft, though the flavor is a little less rich than with real butter. Choose a dairy-free butter that behaves like stick butter, not a soft tub spread, or the frosting may turn loose.
Cupcake Version
Portion the colored batter into lined cupcake wells and swirl lightly with a toothpick. Bake for a shorter time, usually around 18 to 22 minutes, until the centers spring back when touched. You’ll lose the dramatic slice effect, but each cupcake keeps the same festive color pattern.
Make-Ahead for a Crowd
Bake the cake layers a day ahead, wrap them well, and frost them the next day. The crumb settles overnight, which makes the cake easier to frost cleanly. If you want the berries to stay fresh and perky, add them just before serving instead of overnight.
Storage and Reheating
- Refrigerator: Store covered for up to 4 days. The cake stays moist, though the frosting firms up in the fridge.
- Freezer: The unfrosted cake layers freeze well for up to 2 months. Wrap each layer tightly in plastic, then foil, and thaw before frosting.
- Reheating: Let slices come to room temperature before serving for the best texture. If you chill the cake, the butter in the frosting can taste firm and mute the crumb.
Answers to the Questions Worth Asking
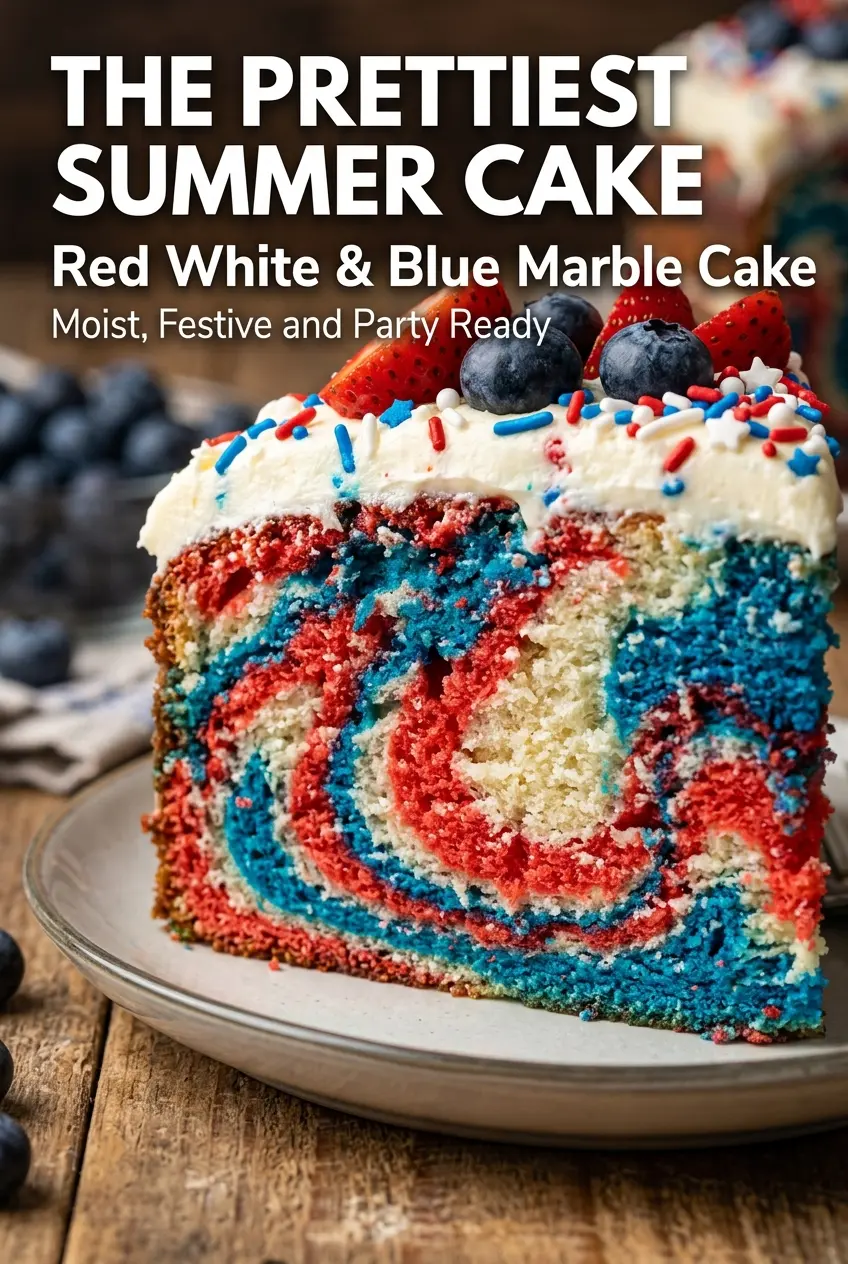
Red White & Blue Marble Cake
Ingredients
Equipment
Method
- Preheat the oven to 350°F (175°C).
- Grease and flour two 8-inch cake pans.
- Whisk the all-purpose flour, baking powder, and salt together.
- Beat the unsalted butter, softened, and granulated sugar until fluffy.
- Add the eggs one at a time, beating after each addition.
- Mix in the vanilla extract.
- Alternate adding the flour mixture and whole milk, mixing just until combined.
- Divide the batter into three bowls.
- Leave one bowl white; color one bowl red gel food coloring and one bowl blue gel food coloring.
- Spoon the batters into the pans and swirl gently to marble.
- Bake for 28–32 minutes, until the centers spring back lightly.
- Cool the cakes completely.
- Beat the unsalted butter, softened, with the powdered sugar until smooth.
- Mix in the heavy cream and vanilla extract until the frosting is creamy.
- Frost the cake layers and decorate with red, white, and blue sprinkles, fresh blueberries, and fresh strawberries.
- Slice and serve.