Cool, creamy layers of vanilla ice cream, tender pound cake, and fresh berries make this ice cream cake feel festive without being fussy. The slices hold together cleanly, the fruit cuts through the richness, and the whipped topping gives it that classic birthday-cake look without turning the whole dessert heavy. It’s the kind of dessert that disappears fast because it eats like a cross between a berry shortcake and an old-school ice cream bar.
What makes this version work is the balance between structure and softness. Slightly softened ice cream spreads into an even layer without tearing the cake, but it still needs enough chill time to set up firmly before you unmold it. The pound cake matters here because it stays tender after freezing instead of turning sandy or brittle. Fresh strawberries and blueberries add bursts of flavor and keep the dessert from tasting flat, while the sauces bring a little extra color and sweetness right where you want it.
Below, you’ll find the timing that keeps the layers neat, plus a few smart swaps if you need to work with what’s already in the freezer. A clean freeze is the whole trick, and once you’ve done it once, you’ll want to make it for every summer gathering.
The cake sliced beautifully after the second freeze, and the berries stayed bright instead of turning icy. I loved that the whipped topping didn’t melt off the sides when I served it.
Love the clean layers and berry-studded slices in this Red White and Blue Ice Cream Cake? Save it to Pinterest for your next cookout or Fourth of July dessert table.
The Freeze Time That Keeps the Layers from Sliding
The biggest mistake with an ice cream cake is trying to rush the structure. If the first ice cream layer is too soft, it will seep into the cake and blur the layers instead of sitting neatly on top. If it’s too hard, you’ll tear the cake and end up with uneven chunks instead of clean slices. The sweet spot is slightly softened ice cream that spreads easily but still looks thick and spoonable.
The other thing that matters is the second freeze before unmolding. That pause gives the whole cake enough firmness to release from the pan without collapsing at the sides. If you skip it, the whipped topping and berries will slide around before the cake can support them. A springform pan helps a lot here because you can lift the ring away instead of wrestling the dessert out of a rigid pan.
What Each Layer Is Doing in This Ice Cream Cake

The pound cake is your backbone. It stays tender in the freezer and gives each slice enough support to stand up under the ice cream. Store-bought works fine here, and that’s one place I’d save time without overthinking it.
Vanilla ice cream is the base flavor, so use one you’d happily eat by the spoonful. A low-quality ice cream can freeze too hard or taste icy after a long chill. Slightly softened ice cream is what lets you spread the layer evenly; if it’s rock hard, it will drag the cake apart.
The berries do more than decorate. Strawberries bring juiciness and a little tartness, while blueberries keep the flavor from leaning too sweet. If your berries are very wet, pat them dry first so they don’t bleed into the ice cream and turn the layers streaky.
Whipped topping gives the cake that classic finished look and helps anchor the decoration. Homemade whipped cream can work for serving the same day, but whipped topping holds up better if the cake sits in the freezer for a while after decorating.
Building the Cake So It Slices Cleanly
Start with the parchment and pan
Line the springform pan with parchment before you build anything. That small step keeps the cake from sticking to the base and makes it easier to lift onto a serving plate later. Press the cake slices into a single even layer so there aren’t gaps that let melted ice cream drip through. If the slices don’t fit perfectly, cut them to size instead of forcing them.
Spread the ice cream in thin, even layers
Spoon half the softened ice cream over the first cake layer and nudge it to the edges with an offset spatula or the back of a spoon. Thick clumps create pockets that freeze unevenly, so work patiently and smooth as you go. Sprinkle the berries over the ice cream before it softens again. That keeps them from sinking to the bottom and gives you visible red and blue bursts in every slice.
Freeze before you finish decorating
Once the second cake layer and remaining ice cream are in place, freeze the cake until it feels firm all the way through. Four hours is the minimum, but longer is better if your freezer runs warm or your layers were especially soft. After unmolding, spread on the whipped topping, add the remaining berries and sauces, then freeze again for a short stretch so the decoration sets before slicing. A few extra minutes here keeps the topping from smearing when the knife goes in.
How to Adapt This Ice Cream Cake for Different Needs
Use angel food cake instead of pound cake
Angel food cake gives you a lighter, more airy dessert that freezes a little softer than pound cake. It won’t have the same rich butteriness, but it does keep the cake from feeling too dense once the ice cream is layered in.
Make it dairy-free
Use a dairy-free vanilla ice cream and a coconut-based or oat-based whipped topping. The texture will be a little softer than the original, so give it extra freezer time before unmolding and slicing.
Swap the fruit based on what’s ripe
Raspberries work well in place of strawberries if you want a sharper berry flavor, and blackberries add a deeper color contrast. Just keep the fruit pieces small enough that the cake still slices neatly.
Storage and Reheating
- Refrigerator: This cake doesn’t belong in the fridge for long. It softens fast, so slice only what you need and return the rest to the freezer right away.
- Freezer: Freeze tightly wrapped for up to 1 week for the best texture. After that, the cake is still safe to eat, but the ice cream can pick up freezer flavor and the berries may start to weep.
- Reheating: Not applicable. Let slices sit at room temperature for 5 to 10 minutes before serving so the knife goes through the layers without crushing them.
Questions I Get Asked About This Recipe
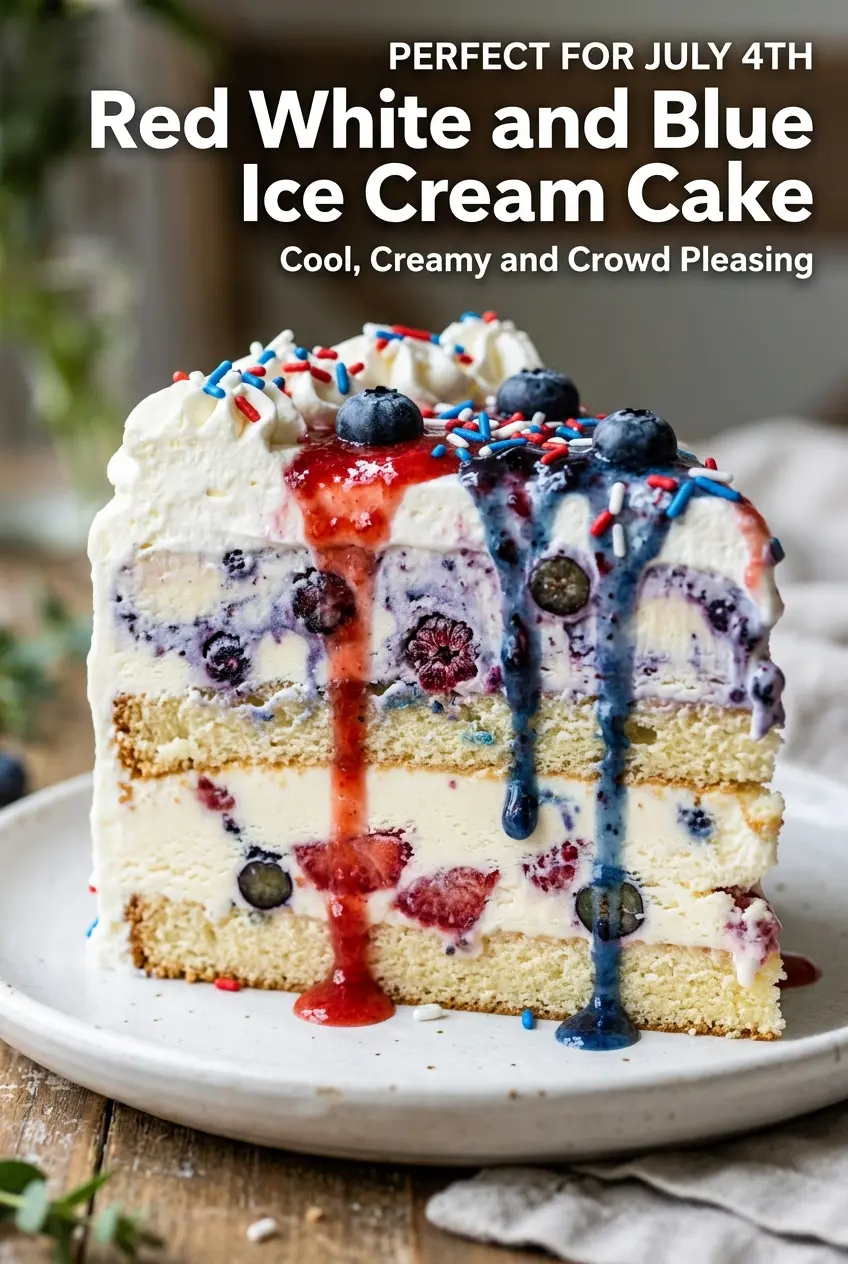
Red White and Blue Ice Cream Cake
Ingredients
Equipment
Method
- Line an 8-inch springform pan with parchment paper so the cake releases cleanly after freezing.
- Arrange pound cake slices in the bottom of the pan to form a solid base layer.
- Spread half of the slightly softened vanilla ice cream over the cake layer for an even, creamy coverage.
- Sprinkle half of the strawberries and blueberries over the ice cream so each bite has fruit.
- Add another layer of pound cake slices to lock in the filling layers.
- Spread the remaining vanilla ice cream evenly over the top to smooth the surface.
- Freeze the cake for at least 4 hours until firm.
- Remove the cake from the pan and frost with whipped topping to cover the entire top and sides.
- Decorate with remaining berries, strawberry sauce, blueberry sauce, and patriotic sprinkles for a layered, flag-inspired look.
- Freeze for 30 minutes before slicing and serving so the slices hold their shape.