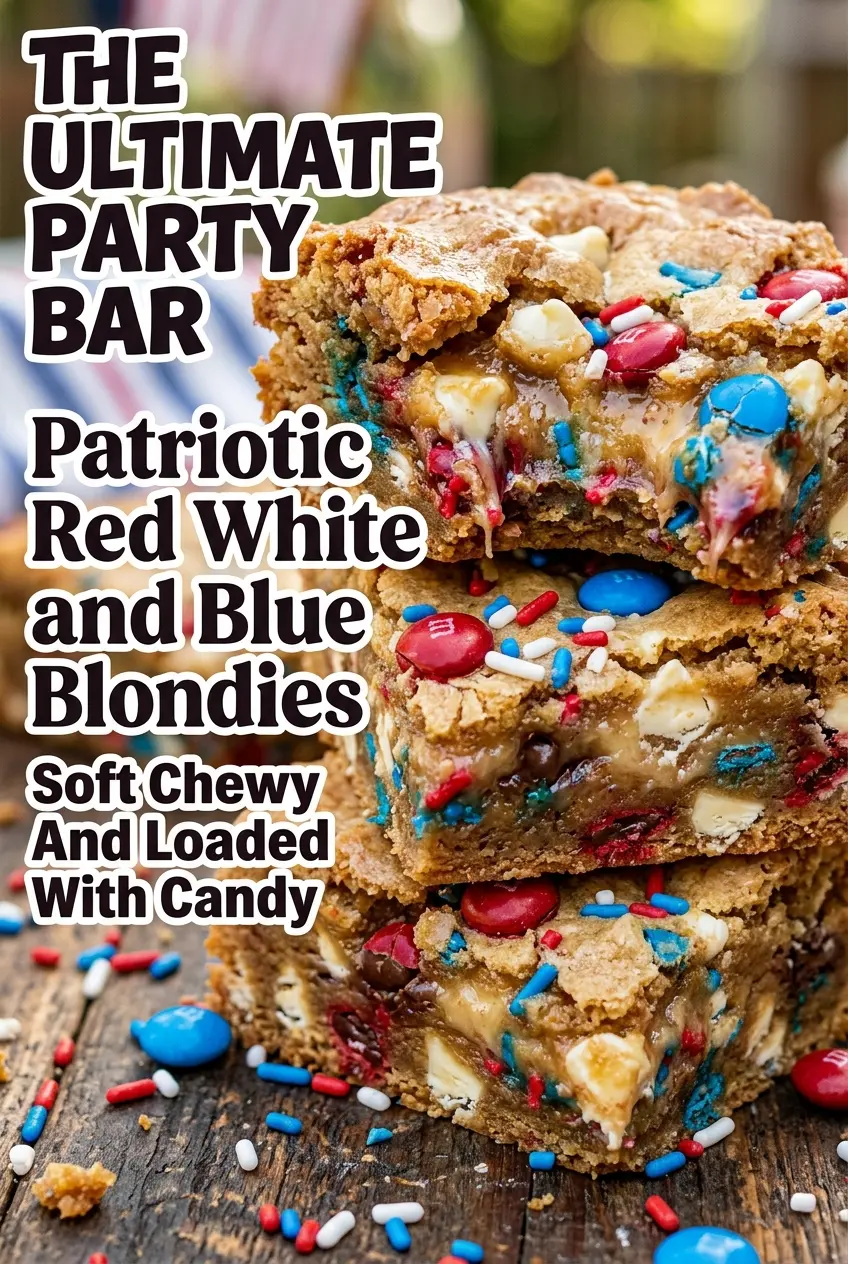
Buttery blondies with crisp edges and a soft, chewy center are already a good idea. Add white chocolate, candy-coated chocolates, and a shower of red, white, and blue sprinkles, and you get dessert bars that disappear fast at potlucks and cookouts. The best part is that they slice cleanly once cooled, so they look as polished as they taste.
This batch works because the melted butter gives the bars that dense, fudgy chew, while brown sugar brings a caramel note that keeps them from tasting flat. I like folding the mix-ins in at the end so the batter stays thick and the candies don’t bleed too much color into the dough. A short bake keeps the center soft; if you wait for the whole pan to look fully set, the bars will come out dry.
Below you’ll find the little details that matter, from keeping the edges from overbaking to the easiest way to get a bright, festive top without making the bars crumbly.
The blondies baked up thick and chewy, and the white chocolate kept them from tasting too sweet. I pulled them at 27 minutes and they set up perfectly after cooling, even with all the extra sprinkles on top.
Save these Patriotic Red White and Blue Blondies for the dessert table when you want chewy bars with a festive candy-studded top.
The Edge-to-Center Bake That Keeps These Blondies Chewy
Blondies dry out when the pan stays in the oven until the center looks fully set. By then, the edges are already overdone. The goal here is a lightly golden top, set edges, and a center that still looks a little soft when you pull the pan.
Melting the butter first also changes the texture in a good way. Creamed butter traps air and bakes up more cake-like. Melted butter gives you a denser, chewier bar with those thin shiny tops that crack a little as they cool. That texture is what makes these bars worth repeating.
What Each Ingredient Is Actually Doing in These Blondies
- Unsalted butter — Melted butter is what gives these bars their dense, chewy texture. Salted butter will work in a pinch, but you lose some control over the seasoning, so I’d keep the salt as written if you swap it in.
- Light brown sugar — This brings moisture and that caramel flavor blondies need. Dark brown sugar will make the bars a little deeper and more molasses-heavy, which is nice if you like a stronger brown sugar taste.
- All-purpose flour — This is the structure. Too much flour makes blondies dry and cakey, so spoon and level it instead of packing it into the cup.
- White chocolate chips — These soften as the bars bake and add creamy pockets that balance the candy coating. If you only have regular chocolate chips, the bars will taste sweeter and more chocolate-forward, but the look changes.
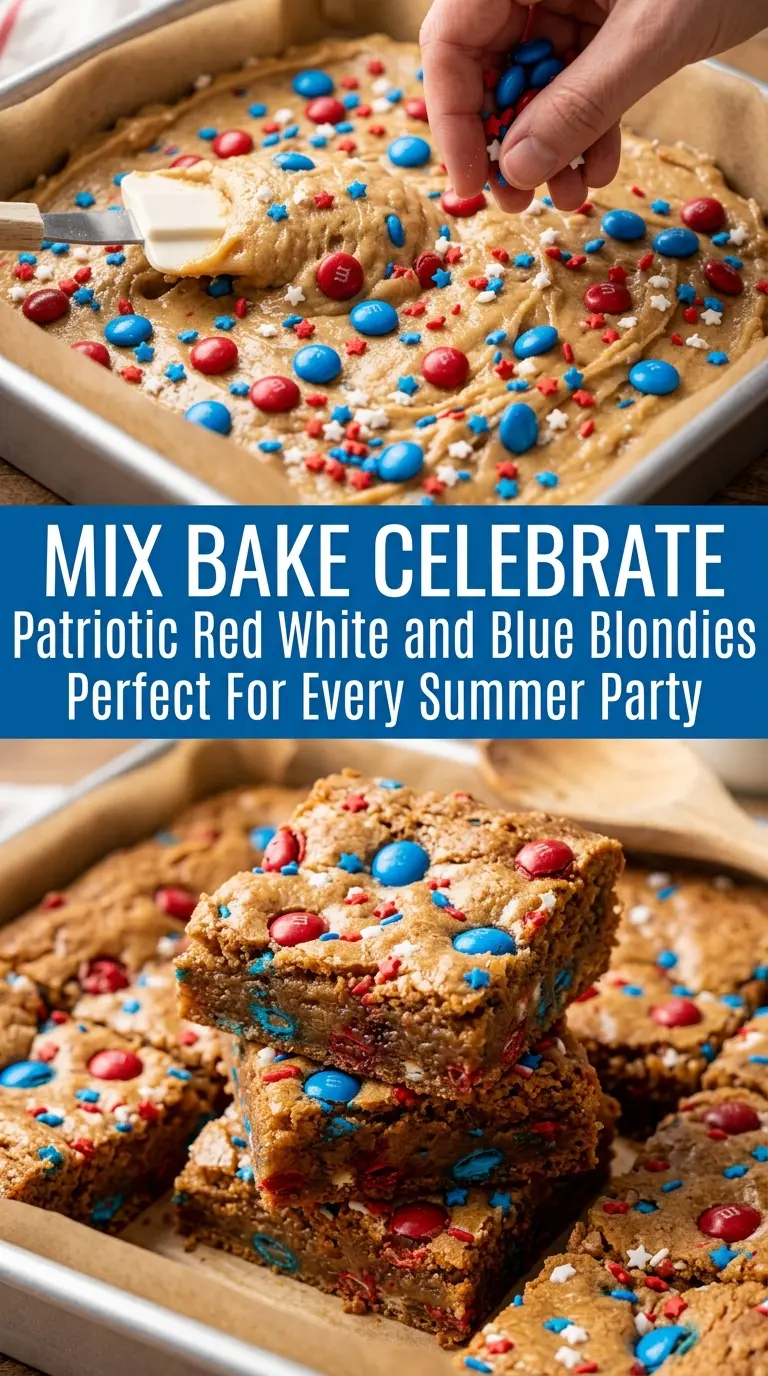
- Candy-coated chocolates and sprinkles — These are mostly for color and crunch, and they make the bars instantly festive. Add a little extra on top before baking so the finished bars still look bright after slicing.
The Mixing Order That Keeps the Batter Thick and the Candy Pieces Evenly Spread
Start with the butter and sugar
Whisk the melted butter and brown sugar until the mixture looks glossy and no dry sugar pockets remain. That step helps the sugar dissolve enough to give you a smoother top and a better chew. If the butter is piping hot, let it cool for a few minutes first so the eggs don’t scramble when they go in.
Add the eggs and vanilla
Mix in the eggs one at a time, then stir in the vanilla. The batter should look thicker and a little satiny after the eggs are incorporated. If it looks separated, keep whisking; it usually comes together once the flour goes in.
Fold in the dry ingredients and mix-ins
Stir in the flour, baking powder, and salt just until the last streaks disappear. Overmixing here tightens the bars and makes them tougher than they should be. Fold in the white chocolate chips and candy-coated chocolates last so they stay mostly intact and don’t sink.
Bake until the center is just set
Spread the batter evenly into a parchment-lined 9×13-inch pan and scatter a few more candies and sprinkles over the top. Bake until the edges are lightly browned and the center no longer looks wet, but still gives a little when pressed gently. A toothpick should come out with a few moist crumbs, not raw batter. Let the pan cool completely before cutting or the bars will smear and fall apart.
Three Ways to Adjust the Bars Without Losing the Chewy Texture
Make them gluten-free
Use a 1:1 gluten-free baking blend that includes xanthan gum. The texture will still be chewy, though the bars may be a little more delicate when warm, so give them extra cooling time before slicing.
Swap the candy mix for another color scheme
Any candy-coated chocolate works here. Easter pastels, school colors, or Halloween orange and black all bake the same way, but stick with the same total amount so the bars don’t get overloaded and crumbly.
Make them a little less sweet
Cut the sprinkles back a bit and use bittersweet or dark chocolate chunks in place of some of the white chocolate chips. The bars will still be festive, but the finish tastes cleaner and less candy-forward.
Storage and Reheating
- Refrigerator: Store in an airtight container for up to 5 days. The bars firm up a little in the fridge, which makes them easy to stack and transport.
- Freezer: These freeze well. Wrap individual squares tightly and freeze for up to 2 months, then thaw at room temperature so the chocolate doesn’t sweat.
- Reheating: You don’t need to reheat them, but if you want a softer texture, warm a bar for 8 to 10 seconds in the microwave. Longer than that melts the candies and turns the edges greasy.
Answers to the Questions Worth Asking
Patriotic Red White and Blue Blondies
Ingredients
Equipment
Method
- Preheat the oven to 350°F (175°C). Set out a 9×13-inch baking pan for lining.
- Line the 9×13-inch baking pan with parchment paper. Leave enough overhang to lift the blondies out easily.
- Whisk the melted unsalted butter and light brown sugar until smooth. Stop and scrape the bowl so no sugar pockets remain.
- Add the eggs and vanilla extract. Whisk until the mixture looks glossy and fully combined.
- Mix in all-purpose flour, baking powder, and salt. Stir just until no dry flour streaks show.
- Fold in the white chocolate chips and red, white, and blue candy-coated chocolates. Distribute them evenly through the batter.
- Spread the batter evenly into the prepared pan. Smooth the top so it bakes uniformly.
- Sprinkle extra red, white, and blue candy-coated chocolates and patriotic sprinkles on top. Lightly press them into the surface so they adhere.
- Bake at 350°F (175°C) for 25–30 minutes. Look for a set top with a slightly soft center.
- Cool completely before slicing. This firms the texture for cleaner squares.
- Cut into squares and serve. Enjoy the red, white, and blue candy-filled layers in every bite.