At 325°F, the skin on a 12- to 14-pound turkey can turn golden before the breast and thigh are ready. That gap is why I don’t use color or the clock alone to decide when Juicy Roast Turkey is done. I start with a fully thawed bird, dry it well, and keep a thermometer close; the payoff is meat that stays moist instead of being held in the oven while I wait for darker skin.
The step that changes the texture most happens before roasting: I loosen the skin and spread softened sage butter directly over the breast and thighs. It puts seasoning against the meat, while the butter coats the outside too. Onion, lemon, and thyme sit loosely in the cavity, where they lend aroma without turning the center into packed stuffing. With the bird breast-side up on a rack, the oven does the steady work, and a full rest gives the juices time to settle before carving.
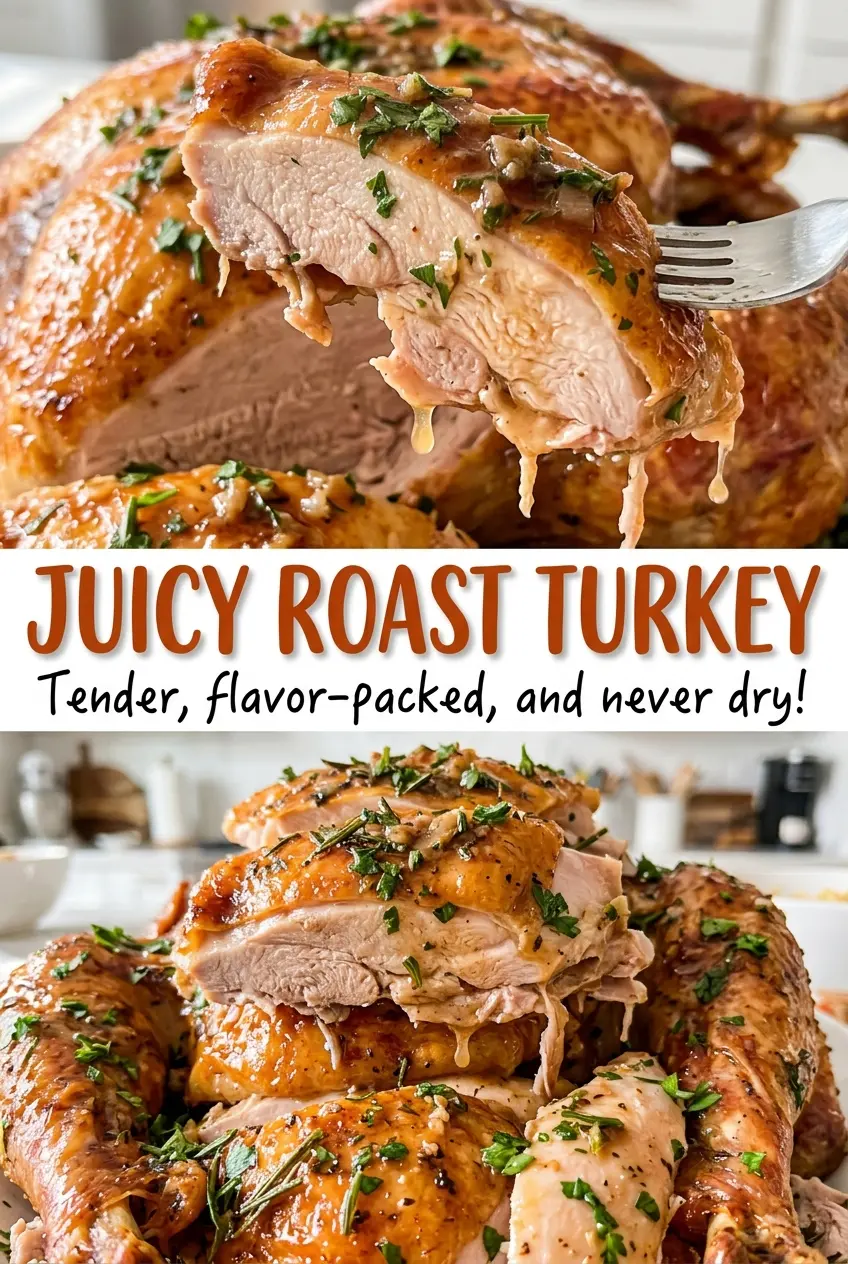
The finished turkey comes out fragrant with sage, golden on the outside, and easy to slice.
Kitchen Note
Dry the turkey inside and out with paper towels before you season it. Damp skin makes the butter harder to spread evenly, and rinsing the bird can splash raw poultry juices around the sink.
Save Juicy Roast Turkey for a holiday table or Sunday dinner, with sage butter tucked under the skin and a simple onion, lemon, and thyme aroma.
A Browned Turkey Isn’t Necessarily a Finished Turkey
The outside of a whole turkey tells you how its skin is browning, not whether the meat at the center is ready. That’s especially easy to misread on a large bird: the breast and thighs don’t cook at exactly the same pace, and the color of the skin can’t tell you what’s happening near the bone. A timer is useful for knowing when to start checking, but it can’t account for every bird or oven.
Take separate thermometer readings in the thickest part of the breast and the innermost thigh, keeping the probe from touching bone. Those two checks answer different questions: the breast reading protects the leanest meat from being left in the oven unnecessarily, while the thigh reading confirms the darker meat has cooked through. If the readings don’t match, use the lower one to guide the next check rather than carving based on the more attractive skin. Once both locations reach the required temperature, the turkey is ready to leave the oven.
What the Sage Butter and Cavity Aromatics Each Contribute

- Whole turkey — Start with a fully thawed bird in the specified size range. A fresh-looking package matters less than having a turkey that’s completely thawed, including the cavity, so you can remove the neck and giblets and season it evenly.
- Kosher salt — It seasons the meat as well as the cavity. Stick with kosher salt here; table salt is finer and denser by volume, so a direct spoon-for-spoon swap can leave the turkey too salty.
- Unsalted butter — Softened butter spreads beneath the skin without running off as soon as you handle it, and unsalted butter lets the salt do its job without adding an unpredictable extra dose. Ordinary grocery-store butter is fine; it doesn’t need to be a specialty brand.
- Fresh sage and black pepper — Chopped fresh sage gives the butter its woodsy aroma, while pepper adds a gentle bite. Use fresh sage that still smells fragrant; if you’re out, leave it out rather than guessing at a dried-sage conversion.
- Onion, lemon, and thyme — These aromatics scent the cavity as the turkey roasts. Use a fresh lemon and firm onion; if one is missing, omit it and keep the others rather than packing the cavity with extra ingredients.
The Four Stages That Keep a Whole Turkey on Track
Dry the Bird and Season Beneath the Skin
Heat the oven to 325°F with a rack in the lower third. Remove the neck and giblets, then pat the turkey dry inside and out; don’t rinse it. Carefully loosen the skin over the breast and thighs, then rub the kosher salt over the outside and inside the cavity, working some beneath the loosened skin. Move gently so you don’t tear the skin, which helps keep the butter in place later.
Spread the Sage Butter Evenly
Stir the softened butter together with the chopped sage and black pepper. Work the mixture beneath the skin over the breast and thighs, then spread the rest over the outside of the turkey. If the skin pulls away from the meat as you work, use your fingers to lift it gradually rather than forcing a gap with a utensil. An even layer gives the breast and thighs seasoning right against the meat.
Set Up the Cavity and Roasting Pan
Place the onion, lemon, and thyme loosely inside the cavity; don’t pack them tightly. Set the turkey breast-side up on a rack in a 16-by-13-inch roasting pan. The rack holds the bird above the bottom of the pan, while the open space around the aromatics lets heat circulate through the cavity. Check that the pan sits securely on the oven rack before you slide it in.
Roast, Check Both Locations, and Rest
Roast for 3 to 3¾ hours, tenting the bird loosely with foil if the skin browns too quickly. Insert a thermometer into the thickest part of the breast and the innermost thigh, taking care not to touch bone; both readings need to reach 165°F. If either spot is below that temperature, continue roasting and check again. Transfer the turkey to a carving board, tent loosely with foil, and let it rest for 30 minutes before carving.
Three Ways to Change the Flavor Without Changing the Roast
A gentler, sage-free butter
Leave out the sage and mix the butter with the black pepper instead. You’ll keep the same buttery coating and peppery warmth, but the turkey will have a milder aroma without the distinctive sage note.
A lemon-free cavity
Omit the lemon and leave the onion and thyme loosely in the cavity. The aroma will be more savory and less bright, while the turkey follows the same roasting method.
A dairy-free roast
Leave out the butter, then press the sage and black pepper directly beneath the loosened skin and over the outside after salting. The turkey won’t have the same rich coating, and the skin may brown less evenly, but the seasonings still reach the meat without a butter substitute.
Storage and Reheating
- Refrigerator: Store carved leftovers in a covered container for 3 to 4 days. The skin will soften once refrigerated.
- Freezer: Freeze carved turkey in an airtight freezer-safe container for up to 2 to 3 months for best quality. Thaw it in the refrigerator before reheating.
- Reheating: Warm sliced turkey covered in a 325°F oven until it reaches 165°F, or heat portions in the microwave until steaming hot throughout. Reheat only what you plan to serve; repeated heating dries the meat out.
Questions That Come Up Before the Turkey Goes in the Oven
Juicy Roast Turkey
Ingredients
Equipment
Method
- Preheat the oven to 325°F with a rack in the lower third.
- Remove the neck and giblets from the turkey.
- Pat the turkey dry inside and out with paper towels; do not rinse.
- Carefully loosen the skin over the breast and thighs.
- Rub the salt over the turkey and inside the cavity, working some under the loosened skin.
- Mix the softened butter with the sage and black pepper.
- Spread the butter mixture under the skin and over the outside of the turkey.
- Place the onion, lemon, and thyme loosely inside the cavity.
- Set the turkey breast-side up on a rack in a 16x13-inch roasting pan.
- Roast for 3 to 3 3/4 hours, tenting loosely with foil if the skin browns too quickly, until a thermometer inserted into the thickest part of the breast and the innermost thigh without touching bone reads 165°F.
- Transfer the turkey to a carving board and tent loosely with foil.
- Rest for 30 minutes before carving.