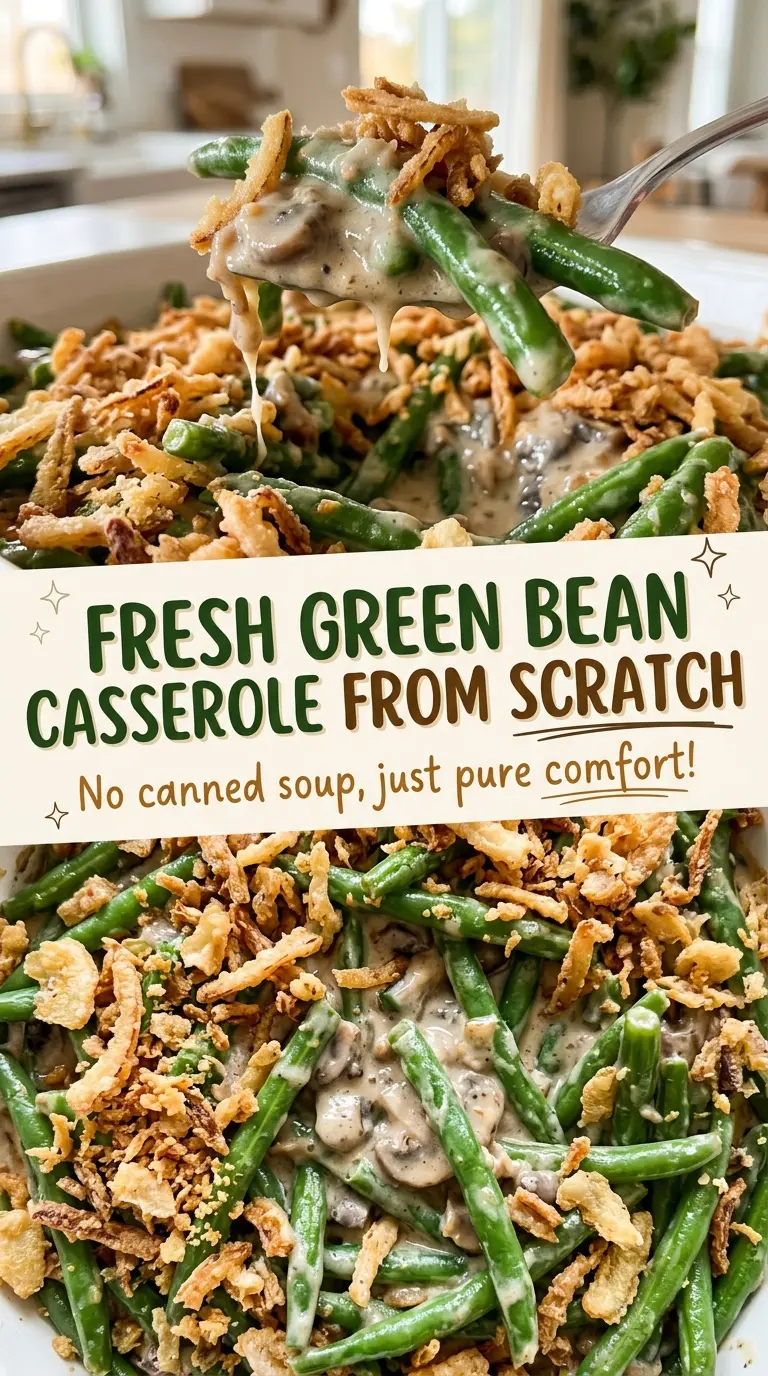
When green beans come out of the pot bright green with a little snap, they’re ready for casserole—not a minute later. I learned that the oven softens them more than you’d expect while the sauce bubbles, so starting with crisp-tender beans keeps the finished dish from turning limp. This fresh green bean casserole from scratch brings those beans together with browned mushrooms and a creamy sauce, then finishes with onions fried until golden.
I cook the beans, mushroom sauce, and onion topping separately before bringing them together. That gives each part the attention it needs: the mushrooms lose their moisture, the sauce thickens on the stove, and the onions stay crisp instead of sitting under the sauce for the whole bake. The result is tender green beans under a savory mushroom sauce, with a crunchy onion top.

Kitchen Note
Slice the onion evenly and thinly so the pieces turn golden at about the same time. If some slices are much thicker than others, the thin ones can darken before the thick ones crisp through.
Save this fresh green bean casserole for its creamy mushroom sauce and crisp, golden onion topping.
Why the Beans Need to Be Crisp-Tender Before They Meet the Sauce
Green beans keep cooking after they leave the boiling water. They also spend time in a hot oven once they’re coated in sauce, so boiling them until fully soft at the start leaves nowhere for the texture to go but mushy. A short blanch gives the beans a head start without taking away their bite.
That crisp-tender stage matters even more in a casserole with a thick sauce. The sauce clings to the beans and holds heat around them, while the oven warms everything through and browns the edges. Starting with bright green beans that still have a little resistance means they finish tender rather than collapsing. This is one of the big differences between a scratch-made casserole and one built around already-soft vegetables: the beans still taste like green beans beneath the creamy mushroom layer.
The sauce should be thick enough to coat a spoon before it goes into the baking dish. It doesn’t need to become stiff on the stove; the oven will bring the casserole together. Keeping the vegetables and sauce at the right stages gives the finished dish distinct textures instead of one soft, uniform filling.
What Fresh Beans, Cremini, and Whole Milk Bring to This Casserole
- Fresh green beans — Their crisp texture holds up through blanching and baking. Choose firm beans without limp or wrinkled spots, and trim the ends before cutting them into pieces. The fresh beans are what give this version its clean, vegetable-forward bite.
- Cremini mushrooms — Cremini bring a deeper, earthier flavor than mild white mushrooms, and browning them gives the sauce its savory base. White button mushrooms work as a substitute if that’s what you have; the sauce will taste a little milder. Cook either kind until the moisture has evaporated before adding flour.
- Whole milk and chicken broth — Whole milk gives the sauce a rounded, creamy texture, while low-sodium chicken broth adds savory depth without making it taste like plain milk gravy. For a vegetarian casserole, replace the chicken broth with vegetable broth; the flavor will lean more vegetal.
- All-purpose flour and yellow onion — Flour does two jobs here: it coats the onion slices before frying and thickens the mushroom sauce. The yellow onion becomes a crisp, savory topping when sliced thinly and fried. A cup-for-cup gluten-free flour blend can replace the all-purpose flour in both places, though the coating may have a slightly different crunch.
Build the Casserole in Separate Stages, Then Add the Crunch
Blanch the Beans Without Softening Them
Heat the oven to 375°F and lightly coat a 9×13-inch baking dish with cooking spray. Bring 4 quarts of water to a boil in an 8-quart pot, add the trimmed green beans cut into 2-inch pieces, and cook for 4-5 minutes. Look for a bright green color and a crisp-tender bite; the beans shouldn’t be limp. Drain them well and spread them on a rimmed baking sheet to cool.
Fry the Onion Slices Until Golden
Toss the thinly sliced onion in a medium bowl with 1/2 cup of the flour and 1/2 teaspoon of the salt. Heat 1 1/2 cups of vegetable oil to 350°F in a 10-inch skillet, then fry the onions in batches for 2-3 minutes per batch, turning once. They’re ready when golden and crisp, not merely translucent or pale. Drain each batch on paper towels so excess oil doesn’t cling to the finished topping.
Brown the Mushrooms Before Thickening the Sauce
Melt the butter in a 12-inch skillet over medium heat, add the sliced mushrooms, and cook for 6-8 minutes until browned and their moisture has evaporated. If the mushrooms still look wet, give them a little more time before adding the garlic; extra liquid can leave the sauce loose. Cook the minced garlic for 30 seconds, then stir in the remaining flour and cook for 1 minute. Gradually whisk in the milk and broth, bring the mixture to a simmer, and cook for 3-5 minutes, stirring, until it coats a spoon; stir in the remaining salt and the black pepper.
Bake the Sauce and Beans Before Adding the Topping
Toss the cooled beans with the mushroom sauce in a 5-quart bowl, then transfer the mixture to the prepared baking dish. Bake for 20-25 minutes, until the edges are bubbling. Scatter the fried onions over the top and bake for another 5-8 minutes, just until the onions are crisp again. Rest the casserole for 10 minutes before serving so the sauce settles instead of running across the plate.
Two Ingredient Swaps That Keep the Casserole Working
Make It Vegetarian with Vegetable Broth
Swap the low-sodium chicken broth for vegetable broth, keeping the rest of the sauce the same. The casserole stays creamy and savory, with a slightly more vegetable-forward taste and no chicken broth.
Use a Cup-for-Cup Gluten-Free Flour Blend
Choose a gluten-free blend labeled for one-to-one replacement and use it wherever the all-purpose flour appears: in the onion coating and the sauce. The sauce will still thicken, though the onion coating may fry up a little differently from the wheat-flour version.
Storage and Reheating
- Refrigerator: Refrigerate leftovers in a covered container for 3-4 days. The onion topping will soften as it sits.
- Freezer: Freezing the assembled casserole isn’t ideal; the milk-based sauce may separate as it thaws, and the onions lose their crispness.
- Reheating: Reheat individual portions in the microwave until the center reaches 165°F. Use short intervals so the sauce heats evenly; a long blast can leave the edges hot before the middle is warm.
Questions That Come Up Before the Casserole Goes in the Oven
Fresh Green Bean Casserole from Scratch
Ingredients
Equipment
Method
- Heat the oven to 375°F and lightly coat a 9x13-inch baking dish with cooking spray.
- Bring the 4 quarts water to a boil in an 8-quart pot.
- Add the green beans and cook for 4-5 minutes, until bright green and crisp-tender.
- Drain the beans well and spread them on a rimmed baking sheet to cool.
- Toss the onion slices in a medium bowl with 1/2 cup flour and 1/2 teaspoon salt.
- Heat the vegetable oil to 350°F in a 10-inch skillet.
- Fry the onions in batches for 2-3 minutes per batch, turning once, until golden and crisp.
- Drain the onions on paper towels.
- Melt the butter in a 12-inch skillet over medium heat.
- Add the mushrooms and cook for 6-8 minutes until browned and their moisture has evaporated.
- Add the garlic and cook for 30 seconds.
- Stir in the remaining 1/4 cup flour and cook for 1 minute.
- Gradually whisk in the milk and broth, then bring to a simmer.
- Cook for 3-5 minutes, stirring, until thick enough to coat a spoon.
- Stir in the remaining 1 teaspoon salt and the pepper.
- Toss the beans with the sauce in a 5-quart bowl.
- Transfer the beans and sauce to the prepared baking dish and bake for 20-25 minutes until bubbling at the edges.
- Scatter the fried onions over the top and bake for 5-8 minutes more, until crisp.
- Rest for 10 minutes before serving.