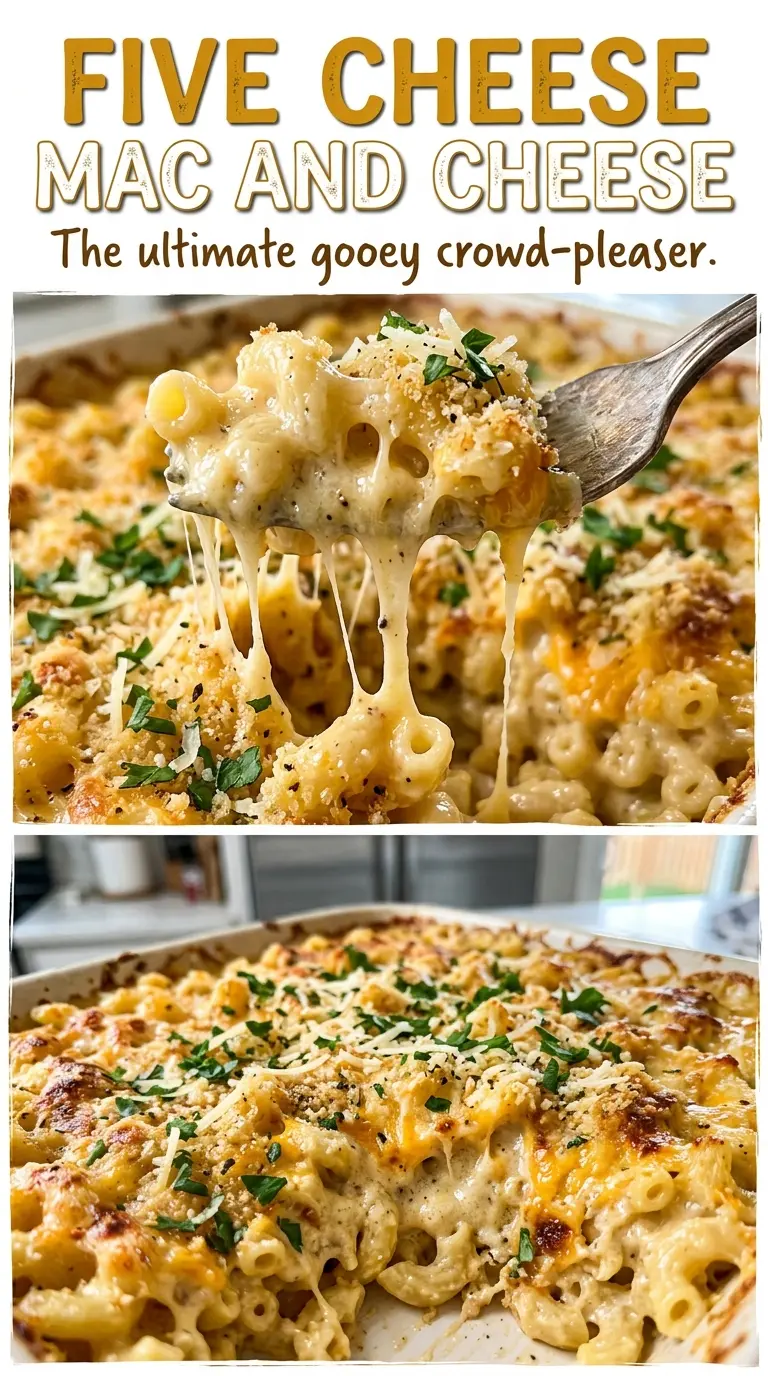
The edges start bubbling before the middle, and that’s exactly what I look for when this pan comes out of the oven. The macaroni has already soaked up some of the cheese sauce, so each spoonful tastes creamy rather than soupy. That balance is what makes this five cheese mac and cheese worth the extra few minutes of shredding.
I use five cheeses for different reasons: cheddar brings its sharp flavor, Monterey Jack melts smoothly, and Gruyere and Parmesan add savory depth. Cream cheese helps the sauce feel lush, too. Once the macaroni is folded in, the oven finishes the dish without drying it out—as long as you take it out when the edges are bubbling and give it time to rest.

Kitchen Note
Pull the macaroni from the boiling water two minutes before the package’s al dente time. It keeps cooking in the oven, so starting it a little firm gives you tender noodles instead of soft, swollen ones.
Save this five cheese mac and cheese for the nights you want bubbling edges, tender elbows, and a smooth sauce in every scoop.
Why the Cheese Goes In After the Sauce Leaves the Heat
A smooth cheese sauce starts with a thickened milk base, but the temperature matters when the cheese goes in. Once the sauce has simmered until it coats the back of a spoon, take the saucepan off the burner before stirring in the cheeses. That short pause keeps the cheese from being exposed to direct, high heat while it melts.
Cheese can turn grainy or oily when it gets too hot. A gentle residual warmth is enough to melt the freshly shredded cheddar, Monterey Jack, Gruyere, finely grated Parmesan, and softened cream cheese into the sauce. Stir until there are no visible lumps before adding the macaroni. If a few small pieces of cream cheese remain, keep stirring off the heat rather than putting the pan back over the burner.
The flour-and-butter base also gives the sauce body before the cheese is added. Whisking warm milk in gradually helps it blend with the roux instead of leaving floury lumps. Give the sauce the full simmering time to thicken; a thin base can leave the finished casserole loose once the pasta goes in.
What Each Cheese Brings to This Five-Cheese Blend
- Sharp cheddar — This is the bold, familiar cheese flavor in the sauce. Buy a block and shred it yourself; pre-shredded cheese is coated to keep the shreds separate and may not melt as smoothly.
- Monterey Jack — Its mild flavor and easy melt soften the sharper cheeses. If you need a close substitute, low-moisture mozzarella melts smoothly too, though the sauce will taste less buttery and mild.
- Gruyere and Parmesan — Gruyere brings a nutty, savory note, while finely grated Parmesan adds a salty, concentrated edge. Freshly shred the Gruyere and grate the Parmesan finely so both distribute through the sauce.
- Cream cheese — Softened cubes blend into the warm sauce and add a creamy, tangy richness. Let it soften before cooking and cut it into cubes so it incorporates without long stirring.
- Whole milk, butter, and flour — Together, these form the thickened base that holds the cheese. Warm the milk before whisking it in; cold milk is more likely to cool the roux and make the sauce harder to smooth out.
- Dry mustard — It adds a savory background note that helps the cheese taste more rounded without making the dish taste like mustard. Measure it before you start so it can be whisked in with the seasonings.
- Elbow macaroni — The curves catch sauce and make the casserole easy to scoop. Use the package’s al dente timing as your reference, then drain the pasta two minutes early for the oven finish.
Building the Sauce and Baking Until the Edges Bubble
Cook the Elbows Just Short of Al Dente
Heat the oven to 350°F and grease a 9×13-inch baking dish. Bring 4 quarts of water and 1 tablespoon kosher salt to a boil in a large pot, then add the elbow macaroni. Cook it until two minutes shy of the package’s al dente time; the pasta should still have a little firmness when you bite into it. Drain it well so extra water doesn’t thin the cheese sauce.
Whisk a Smooth Roux and Milk Base
While the pasta cooks, melt the butter in a 4-quart saucepan over medium heat. Whisk in the flour and cook for 1 minute, stirring so the roux doesn’t catch on the bottom. Gradually whisk in the warmed milk, then add the dry mustard, salt, and black pepper. Bring the mixture to a gentle simmer and whisk for 5 to 7 minutes, until it coats the back of a spoon.
Melt the Five Cheeses Off the Burner
Remove the saucepan from the heat before adding the cheddar, Monterey Jack, Gruyere, Parmesan, and cream cheese. Stir steadily as the cheeses melt into the thickened milk base. The sauce should look glossy and feel smooth rather than stringy or grainy. If it still has small lumps, keep stirring off the heat until they disappear.
Bake Until the Edges Are Active
Fold the drained macaroni into the sauce until the elbows are coated. Transfer everything to the prepared baking dish and bake uncovered for 20 to 25 minutes. Look for bubbling around the edges; the top doesn’t need a dark crust. Rest the casserole for 10 minutes before serving so the sauce settles around the pasta instead of running across the plate.
Two Practical Ways to Adapt the Cheese or Make It Gluten-Free
A Sharper Cheddar-Forward Casserole
Replace the Monterey Jack with the same amount of freshly shredded sharp cheddar. The sauce will have a more pronounced cheddar bite and a little less of Jack’s mild, buttery character; keep the other cheeses in the blend for balance.
A Gluten-Free Version
Use gluten-free elbow macaroni and replace the all-purpose flour with the same amount of a cup-for-cup gluten-free flour blend. The pasta may have a slightly different bite, so use its package timing and still pull it two minutes before its al dente time; whisk the sauce until it coats the back of a spoon.
Storage and Reheating
- Refrigerator: Store leftovers covered for 3 to 4 days. The sauce firms up as it chills, so the macaroni will be less loose than it was straight from the oven.
- Freezer: Freeze airtight portions for up to 2 months for best quality. Thaw overnight in the refrigerator; the cheese sauce may be a little less smooth after freezing.
- Reheating: Cover a portion and warm it gently in the microwave, stirring partway through; a small splash of milk helps loosen the sauce. Reheat leftovers to 165°F, and avoid blasting them on high, which can make the cheese sauce oily.
Questions That Come Up When Making Five Cheese Mac and Cheese
Five Cheese Mac and Cheese
Ingredients
Equipment
Method
- Heat the oven to 350°F.
- Grease a 9x13-inch baking dish.
- Bring the water and 1 tablespoon kosher salt to a boil in a large pot.
- Add the macaroni.
- Cook until 2 minutes shy of the package’s al dente time.
- Drain the macaroni.
- While the pasta cooks, melt the butter in a 4-quart saucepan over medium heat.
- Whisk in the flour and cook for 1 minute.
- Gradually whisk in the warm milk.
- Whisk in the dry mustard, 1/2 teaspoon kosher salt, and black pepper.
- Bring the sauce to a gentle simmer.
- Cook, whisking, until thick enough to coat the back of a spoon, 5 to 7 minutes.
- Remove the saucepan from the heat.
- Stir in the cheddar, Monterey Jack, Gruyere, Parmesan, and cream cheese until melted and smooth.
- Fold the drained macaroni into the cheese sauce.
- Transfer the mixture to the prepared baking dish.
- Bake uncovered until bubbling around the edges, 20 to 25 minutes.
- Let the mac and cheese rest for 10 minutes before serving.