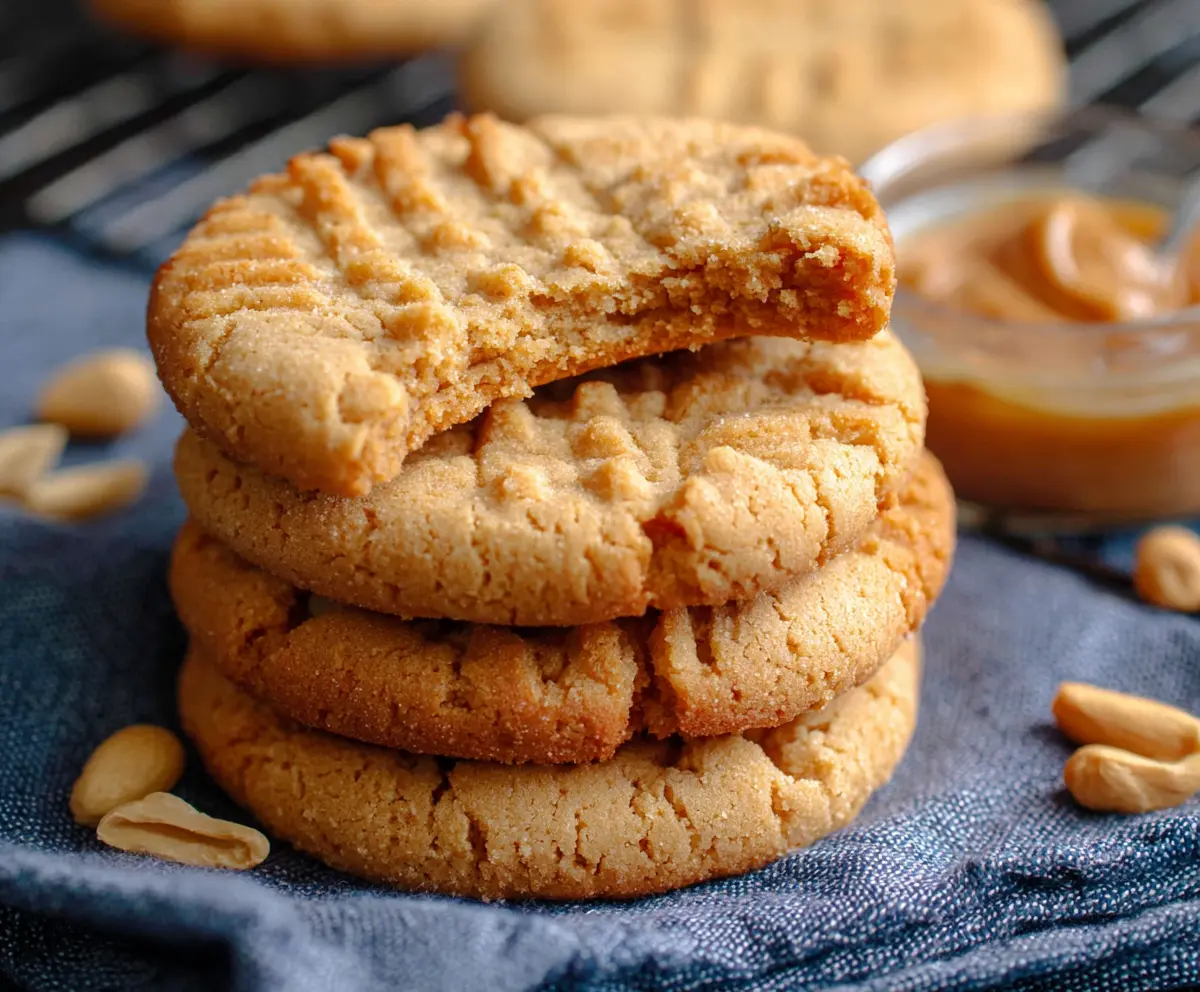
Peanut butter cookies are a classic treat loved by many for their rich, nutty flavor and soft, chewy texture. These cookies have that perfect balance of sweetness and saltiness, with the unmistakable taste of creamy peanut butter shining through every bite.
I always enjoy making these cookies when I want something quick, comforting, and satisfying. One tip I’ve learned is to press the cookies with a fork to create that classic crisscross pattern—it just makes them feel extra special and gives a bit of crunch on the outside while staying soft inside.
These peanut butter cookies are great for sharing with friends or packing in a lunchbox for a little homemade treat. Whenever I bake a batch, the smell fills the whole house and brings back so many warm memories of baking with family. They’re simple, timeless, and always put a smile on everyone’s face.
Key Ingredients & Substitutions
Peanut Butter: Creamy peanut butter works best for smooth, tender cookies. If you prefer texture, you can use crunchy peanut butter for little nutty bits. For allergies, try sunflower seed butter or almond butter instead.
Sugar: Regular granulated sugar gives the cookies a slight crunch and sweetness. You can swap half with brown sugar for a richer, moister cookie. Powdered sugar is not recommended here.
Egg: The egg helps bind the dough and keep cookies soft. If you want a vegan option, use a flax egg (1 tbsp ground flax + 3 tbsp water) or an egg replacer.
Baking Soda: This helps the cookies rise slightly and prevents them from getting too dense. Make sure your baking soda is fresh for best results.
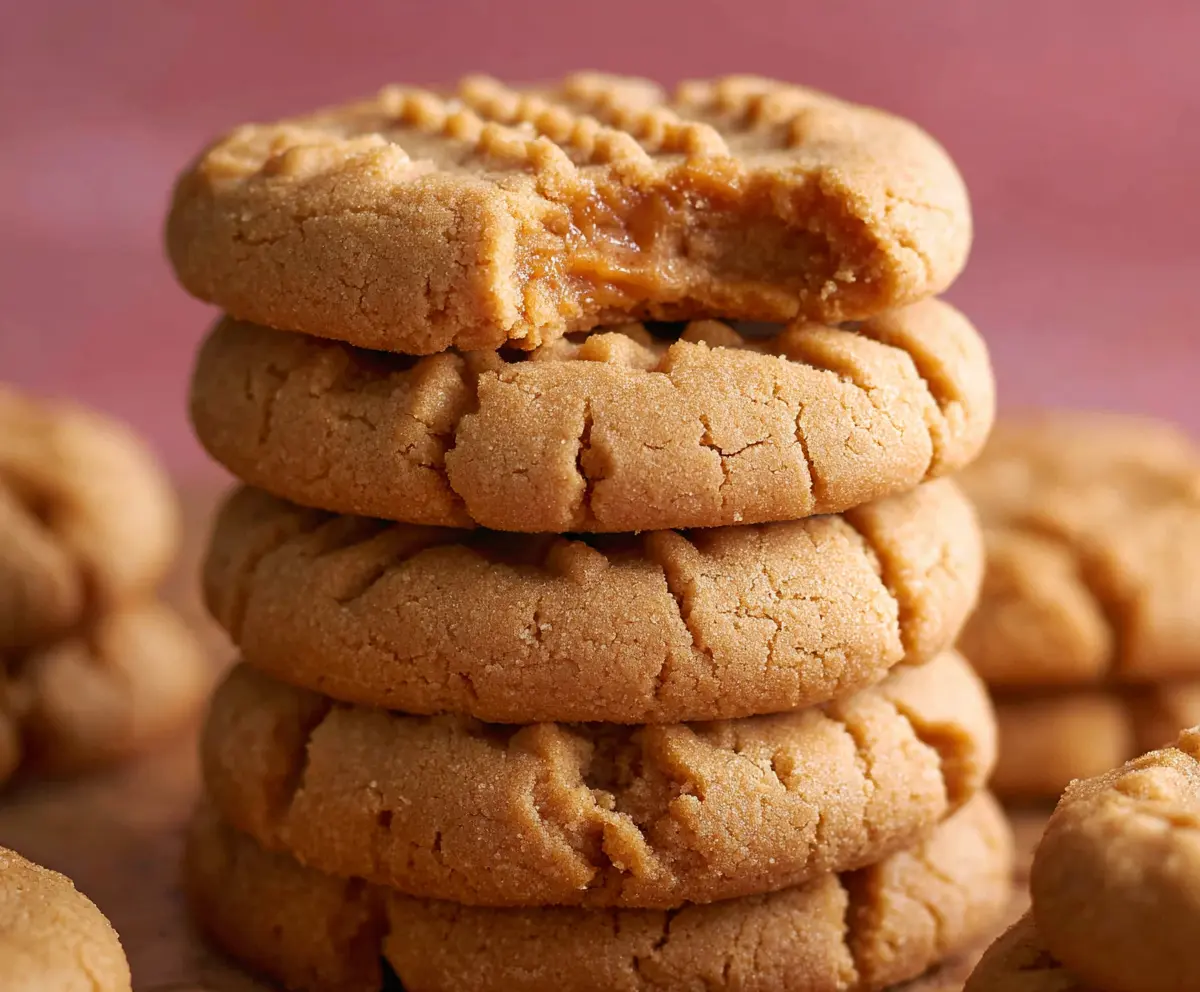
How Do You Get That Classic Crisscross Pattern on Peanut Butter Cookies?
The crisscross fork pattern isn’t just for looks—it helps cookies bake evenly and gives them a nice texture on top. Here’s how I do it:
- After rolling each dough ball, dip your fork in sugar to prevent sticking.
- Press down gently on the ball with the fork to flatten it a bit.
- Turn the fork 90 degrees and press again to create the crosshatch.
- This step creates a bit of crackle and a classic peanut butter cookie appearance.
Remember, don’t press too hard or your cookies might spread too thin. This technique also helps cookies bake evenly so they stay soft inside yet slightly crisp outside.
Equipment You’ll Need
- Baking sheet – a flat, sturdy tray that helps your cookies bake evenly without burning.
- Parchment paper or silicone baking mat – stops cookies from sticking and makes cleanup easy.
- Mixing bowl – big enough to combine all your ingredients comfortably.
- Fork – perfect for making the classic crisscross pattern on each cookie.
- Measuring cups and spoons – to keep your ingredient amounts accurate for best results.
Flavor Variations & Add-Ins
- Add chocolate chips for a sweet contrast to the peanut butter flavor—great if you love a bit of chocolate in your cookies.
- Mix in chopped peanuts to add a crunchy texture and more peanut flavor.
- Swap peanut butter with almond or cashew butter for a different nutty taste and a twist on the classic.
- Sprinkle a pinch of sea salt on top before baking to enhance the sweet and salty balance.
How to Make Peanut Butter Cookies
Ingredients You’ll Need:
- 1 cup creamy peanut butter
- 1 cup sugar
- 1 large egg
- 1 teaspoon vanilla extract
- ½ teaspoon baking soda
- A pinch of salt (optional, if peanut butter is unsalted)
Time Needed:
This recipe takes about 10 minutes to prepare and 10-12 minutes to bake. Allow an additional 5 minutes to cool before enjoying these delicious cookies.
Step-by-Step Instructions:
1. Prepare for Baking:
Preheat your oven to 350°F (175°C). Line a baking sheet with parchment paper or a silicone baking mat to prevent sticking and make cleanup easier.
2. Mix the Dough:
In a mixing bowl, combine the peanut butter and sugar. Stir well until the mixture is smooth and fully combined. Add the egg and vanilla extract, mixing thoroughly. Then, sprinkle in the baking soda and salt (if using) and stir until you have a thick, even dough.
3. Shape the Cookies:
Using a tablespoon, scoop out portions of the dough and roll them into balls. Place the dough balls on your prepared baking sheet about 2 inches apart to give them room to spread.
4. Add the Classic Crisscross Pattern:
Take a fork and gently press each dough ball down, creating a crisscross pattern on the top of each cookie. This not only helps the cookies bake evenly but also gives them their traditional look.
5. Bake and Cool:
Bake the cookies for 10 to 12 minutes, or until the edges turn golden. The centers may look a bit soft but will firm up as they cool. Let cookies rest on the baking sheet for 5 minutes, then transfer them to a wire rack to cool completely.
Enjoy your warm, chewy peanut butter cookies with that perfect homemade touch!
Can I Use Natural Peanut Butter Instead of Creamy?
Yes, you can use natural peanut butter, but it may make the dough a little oilier and softer. Make sure to stir the peanut butter well before measuring, and consider chilling the dough slightly before baking for better shape.
Can I Make These Cookies Gluten-Free?
This recipe is naturally gluten-free since it has no flour. Just double-check your baking soda and other ingredients to ensure they are gluten-free if you have sensitivities.
How Should I Store Leftover Cookies?
Store cookies in an airtight container at room temperature for up to 5 days. For longer storage, freeze them in a sealed bag or container for up to 3 months. Thaw at room temperature before eating.
Can I Add Chocolate Chips or Nuts?
Absolutely! Stir in about ½ cup of chocolate chips or chopped nuts into the dough before baking for extra flavor and texture. Enjoy customizing your cookies to your liking!